Making a Trapeze Bar, Part 3
 Finished.
Recently, while watching me splice a thimble for the 2nd time, a friend of mine made the observation that a trapeze bar is made entirely of work… and a little bit of rope.
Indeed. Sewing the covers on is even worse. I put off the last part for a couple of months because I knew it was going to be a painstaking process. I was not wrong. Cover stitching has to be done by hand, and it takes about 4 hours to do one side. Not including pattern making and wrapping the padding.
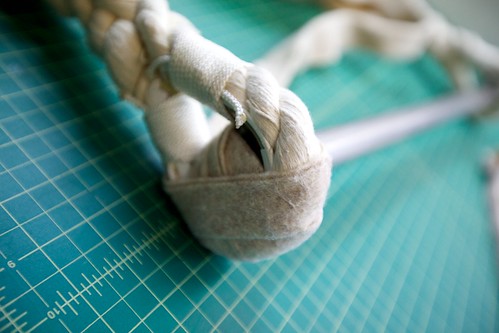 Start wrapping.
For the padding, I used two 4” wide pieces of felt. One at about 2′ long, and the other at about 4′. The felt doesn’t slide against the cotton ropes and stays mostly put. This is important as the ends will be subject to a lot of downward stress over the years, and we don’t want the padding or covers to creep. I wrapped the thimble first, using the shorter piece to give it a little shape. Then I wrapped the splice with the longer piece. They needed to be wrapped fairly tight, so the felt stretches against the cotton and won’t slip.
After wrapping both ends I made a flat pattern with some extra felt. I left a seam allowance so I could fit the leather later. I chose a creme colored cowhide (from S&H Frank’s Leather) to match the cotton ropes. I wanted an all white trapeze bar as it goes with everything, and contrasts against my partners costuming. It also doesn’t chalk up like black or red bars do 😉
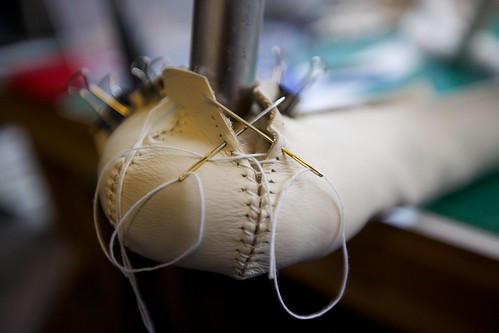 A Stitch In Time.
To fit the leather tightly, I used a lacing stitch. This is just like tying your shoes with a pair of needles. Only much, much slower.
Starting with the bottom seam, I clipped up the leather roughly into position, and then trim it so that I had an 1/8” seam gap. This gap allowed me to pull the leather tightly around the bar end. Then I stitched up the seam all the way to the bar. Next I trimmed and stitched the left and right seams. By now the leather was drawn very tightly around the thimble. To finish the cover up I sewed the ends into the rope with a blanket stitch. Hopefully this will keep them in place.
All in all, I think I spent about 20 hours and around 250$ to make this bar. There where a few things that really pushed the cost up, such as the solid stainless steel bar. If I make another I will probably use schedule 40 pipe, mild steel thimbles, and clear coat it. I will probably also make a cable core version, which is an entirely different beast.